Transforming your living space with new window treatments is an exciting journey that blends interior design with practical functionality. Whether your goal is to block out harsh morning sunlight, improve your home energy efficiency, or simply add a touch of modern elegance to your living room, the right window treatments make all the difference. However, the path to achieving that flawless, magazine-ready look hinges entirely on one critical preliminary step: accurate measurements.
Getting the dimensions wrong by even a fraction of an inch can result in light gaps, rubbing fabrics, or hardware that simply refuses to fit inside the window frame. Custom window treatments are precisely manufactured to the exact specifications provided upon ordering. Because they are tailored specifically for your home, measurement errors can lead to costly mistakes and a frustrating installation process.
This comprehensive guide will walk you through everything you need to know about how to measure for window shades. From understanding the fundamental differences between mounting styles to handling tricky architectural features, you will learn the step-by-step techniques required to ensure a perfect fit every single time.
1. Understanding the Basics: Inside Mount vs. Outside Mount
Before you even pick up a tape measure, you must make the most crucial decision in the window treatment process. You need to determine whether your new shades will be installed inside the window frame or outside the window frame. This choice dictates how you will measure, what kind of hardware you will use, and how the final product will look in your room.
The Inside Mount Aesthetic
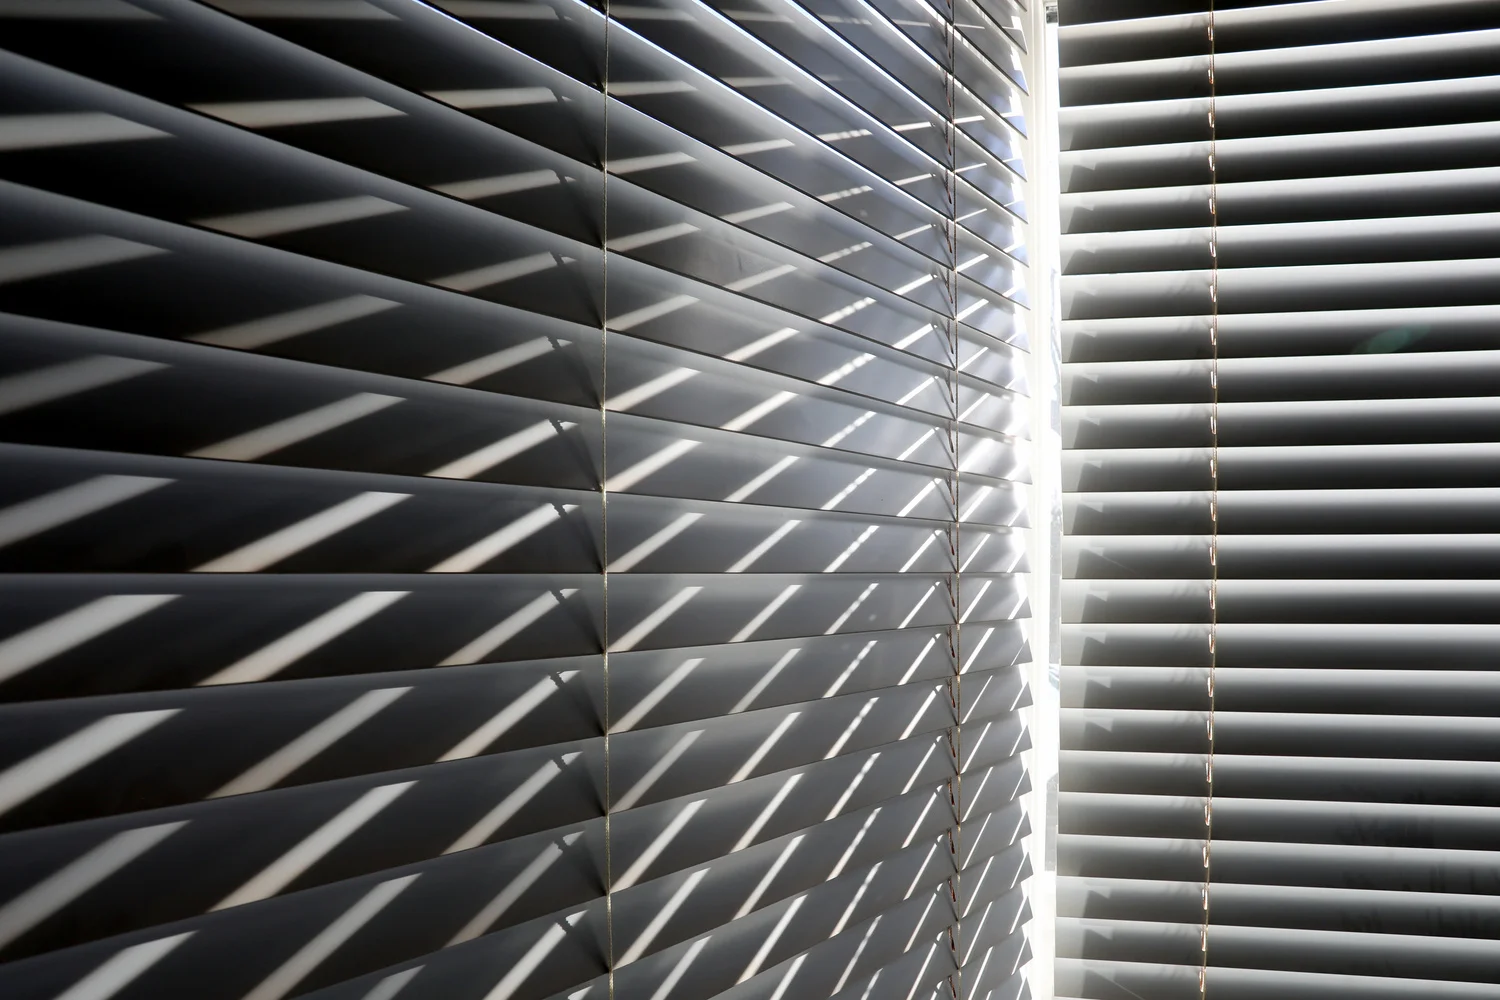
An inside mount means the window shade is installed entirely within the recessed area of your window opening. This is the most popular mounting method in modern interior design. It provides a clean, customized, and built-in look that allows your window molding and decorative trim to remain completely visible. Inside mounts are highly recommended if you have beautiful architectural details around your windows that you wish to highlight.
However, an inside mount requires your window frame to have sufficient depth. Every window shade mechanism, whether it is a sleek roller shade tube, a bulky cellular shade headrail, or a motorized system, requires a minimum amount of space to be securely attached. If your window frame is too shallow, the shade will protrude past the frame. This might interfere with the aesthetic or cause the fabric to catch on the edges. Additionally, inside mounts inherently have small deductions taken by the manufacturer to ensure the shade fits without scraping the sides of the frame. This can sometimes result in tiny “light gaps” on the left and right edges, which is an important consideration if absolute darkness is your goal.
The Outside Mount Solution
An outside mount involves installing the window shade directly onto the window frame itself, on the wall above the window, or even on the ceiling. This method completely covers the window opening and the surrounding trim.
Outside mounts are the perfect solution for several specific scenarios. If your window depth is too shallow for an inside mount, an outside mount is your best alternative. If your windows are noticeably asymmetrical or out of square, an outside mount easily hides these imperfections. Furthermore, if you want to maximize light control and minimize light gaps, extending an outside mount shade several inches beyond the window opening on all sides will block out significantly more light. Finally, outside mounts can create an optical illusion, making small windows appear much larger and ceilings appear taller when the shade is mounted high above the frame.
2. Tools of the Trade and Preparation
Accuracy is non-negotiable when measuring for custom window treatments. Relying on the wrong tools or rushing through the preparation phase is a guaranteed recipe for measurement errors. To measure like a seasoned professional, you need to gather the right equipment and adopt a systematic approach.
The Essential Equipment
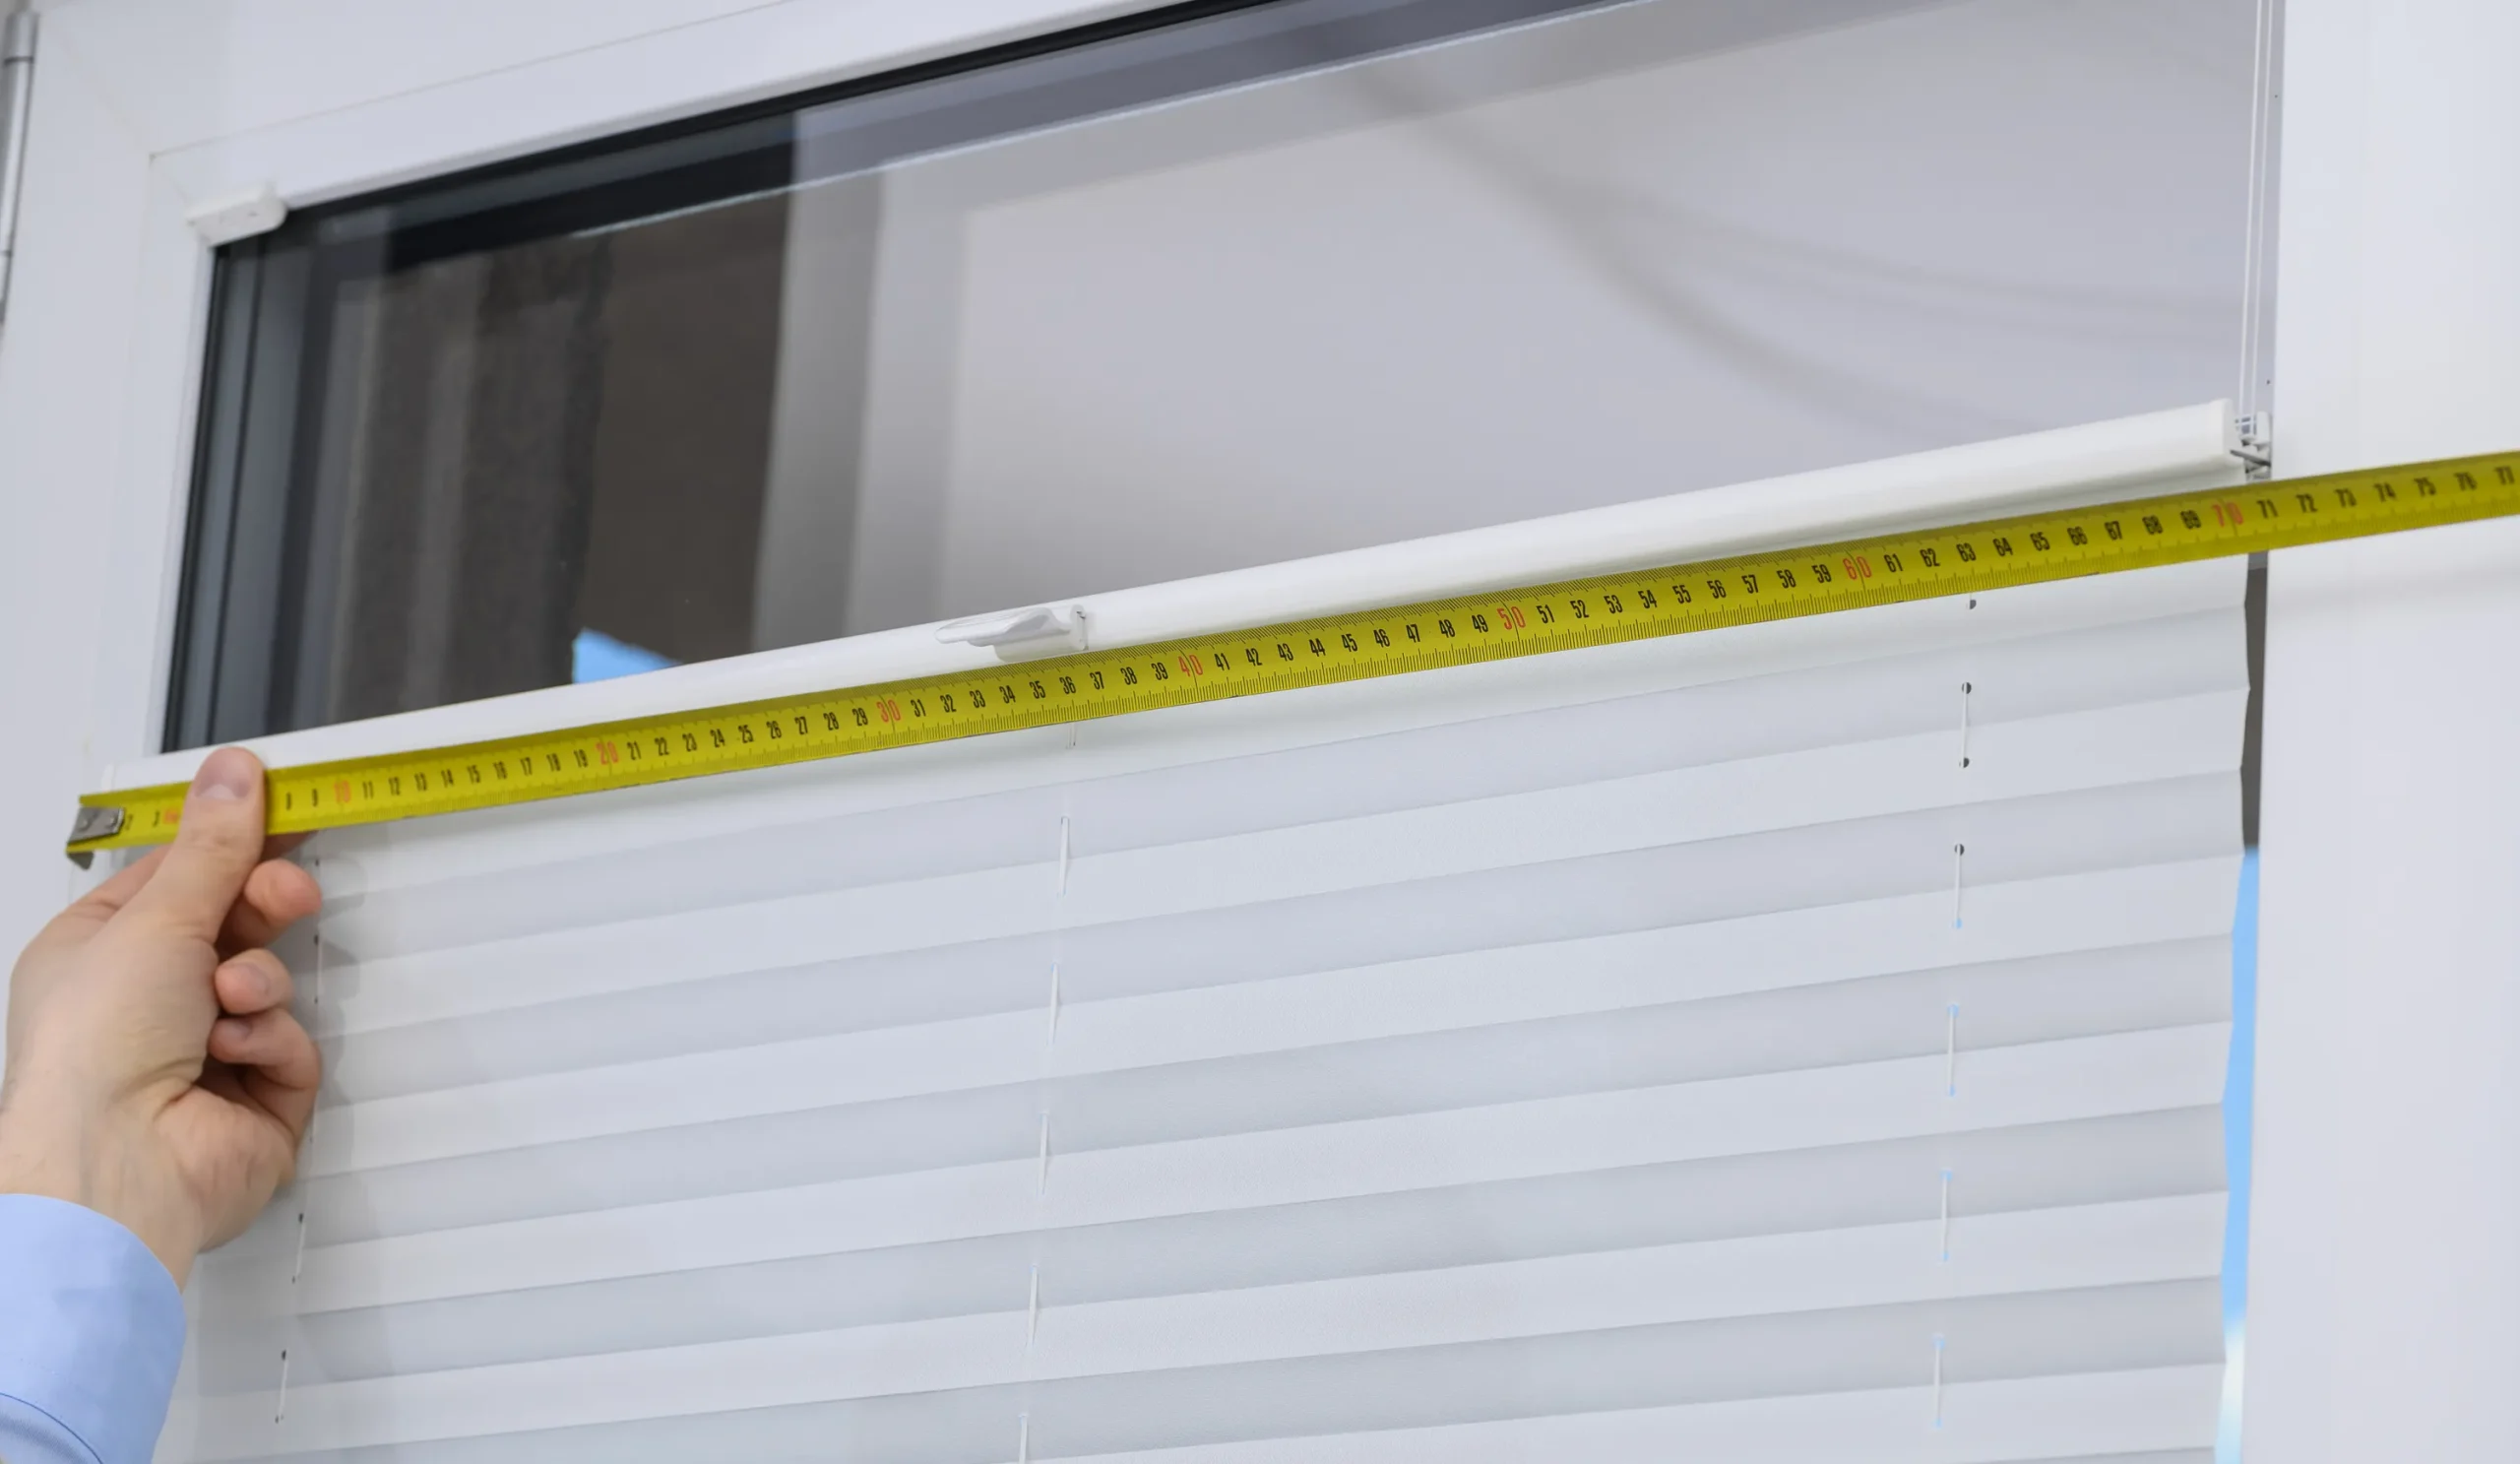
First and foremost, throw away your cloth tailor tape or folding wooden ruler. These tools stretch, bend, and simply cannot provide the rigid accuracy required for architectural measurements. You must use a high-quality, metal tape measure. A 1-inch wide steel tape measure is ideal because it remains rigid over long distances, making it much easier to measure tall or wide windows without the tape collapsing.
You will also need a sturdy step ladder to reach the top of your windows safely. Do not rely on balancing on chairs or stretching uncomfortably, as this will skew your visual angle and lead to inaccurate readings. Keep a blank notepad and a sharp pencil handy. Do not trust your memory. Write down every single measurement the exact moment you take it.
The Standard Format: Width by Height
The window treatment industry operates on a universal standard format for recording measurements: Width first, Height second (W x H). Reversing these numbers is one of the most common and disastrous mistakes a homeowner can make. A shade designed to be 36 inches wide and 72 inches tall is vastly different from one meant to be 72 inches wide and 36 inches tall. Always double-check that you have recorded the width as the horizontal measurement and the height as the vertical measurement.
Measuring Precision
When reading your metal tape measure, accuracy down to the nearest 1/8th of an inch is standard practice in the industry. Do not round up or down to the nearest whole inch or half inch. If the measurement falls between two 1/8th inch marks, the general rule of thumb is to round down to the nearest 1/8th of an inch to ensure the shade does not end up too tight. However, taking exact measurements is always the safest bet.
3. Step-by-Step Guide: Measuring for Inside Mount Shades
Measuring for an inside mount requires capturing the exact dimensions of the window opening. Because window frames are rarely perfectly square, you cannot rely on a single measurement. Houses settle over time, wood warps, and drywall shifts.
Step One: Measure the Depth
Before measuring width and height, verify that you have enough depth. Measure the distance from the glass to the outer edge of the window frame. Be sure to account for any protruding obstacles like window cranks, handles, alarm sensors, or mullions. Check the product specifications for the specific shade you intend to buy to ensure your window meets the “minimum depth for inside mount” and the “minimum depth for flush inside mount” requirements.
Step Two: Measure the Width in Three Places
Measure the horizontal width inside the window frame at the very top, exactly in the middle, and at the very bottom. Write down all three numbers. For inside mount window shades, you will almost always use the narrowest of these three measurements as your final ordering width. Using the narrowest measurement guarantees that the shade will clear the tightest part of the window frame as it moves up and down.
Step Three: Measure the Height in Three Places
Measure the vertical height inside the window frame from the top edge down to the window sill. Measure on the far left side, exactly in the center, and on the far right side. Record all three numbers. For most standard window shades, you will use the longest of these three measurements as your final ordering height. This ensures the shade will be long enough to reach the sill across the entire width of the window, preventing a gap at the bottom.
A Crucial Note on Manufacturer Deductions
When you order an inside mount shade, the factory will automatically make a small deduction from the width you provide (typically between 1/8 inch and 3/8 inch, depending on the product). This is called a factory deduction, and it is done to ensure the shade fits inside the opening without rubbing against the sides. Never take your own deductions. Provide the exact, narrowest width measurement of your window opening, and let the manufacturer handle the math.
4. Step-by-Step Guide: Measuring for Outside Mount Shades
Outside mount measurements are slightly more forgiving than inside mounts because you are not constrained by a rigid window frame. However, you must carefully calculate the necessary overlap to ensure the shade looks balanced and functions correctly.
Step One: Determine the Width and Overlap
Measure the horizontal width of the window opening itself. Next, you must add extra width to this measurement to create an overlap. This overlap is crucial for light control and privacy. The industry standard recommendation is to add a minimum of 1.5 to 2 inches of overlap to both the left and right sides of the window.
For example, if your window opening is 40 inches wide, you should add 3 to 4 inches total, making your final ordering width 43 or 44 inches. If your window has thick decorative molding, you might choose to measure from the outside edge of the left molding to the outside edge of the right molding, provided it gives you sufficient overlap to block out light.
Step Two: Determine the Height and Headrail Placement
Decide exactly where you want to install the mounting brackets above the window. You typically need at least 2 inches of flat surface space above the window opening to securely attach the hardware. Measure from this intended mounting point down to where you want the bottom of the shade to rest.
If you have a protruding window sill, measure down to the sill. If you do not have a sill, or if you want the shade to drop past the window opening, you should add at least 2 to 3 inches of overlap below the bottom of the window frame to prevent light leakage. Write down this total vertical measurement as your final ordering height.
Step Three: Obstruction Check
Carefully examine the area surrounding the window. Ensure there are no bookshelves, light fixtures, architectural bump-outs, or adjacent walls that will interfere with the extra width and height you have calculated for your outside mount.
5. The Professional Advantage: Why Expert Measurement Matters
Navigating the world of window treatments can be surprisingly complex. While DIY measuring is entirely possible for standard, perfectly square windows, the reality is that professionals will do it better. When dealing with out-of-square frames, older architectural designs, intricate bay windows, or highly specific motorization requirements, relying on seasoned experts completely eliminates the risk of stressful and costly mistakes. Navigating tight depth constraints and calculating complex corner alignments is a skill honed over years of daily practice. That is exactly why Anawah Custom Roller Shades has in-home consultations designed to take the guesswork completely out of the process.
Bringing an expert into your home changes the entire dynamic of the project. A professional installer does not just bring a tape measure; they bring a trained eye that can spot potential installation hurdles long before the order is placed. They know exactly how different fabrics behave, how heavy certain headrails are, and whether your drywall or plaster requires specific heavy-duty anchors.
If you have been searching for custom window shades near me, you know that the sheer volume of options, fabrics, and mounting styles can be overwhelming. A local professional simplifies this by assessing your space in real-time, matching fabric samples directly against your paint colors and lighting conditions, and handling all the millimeter-precise measuring. Furthermore, for those specifically looking for top-tier shades installation in Chicago, relying on local experts ensures that your project aligns flawlessly with regional architectural styles and building nuances, guaranteeing a seamless transition from design to the final, beautiful installation.
6. Finalizing Your Measurements and Ordering with Confidence
You have evaluated your mounting options, gathered the correct tools, and meticulously recorded the width and height of every window in your project. The final phase before placing your order is a comprehensive review to guarantee total accuracy.
The Double-Check Process
Never rush the final review. Go back to every single window with your tape measure and your notepad. Re-measure the width and the height one more time. Compare these second readings to your original notes. If there is any discrepancy whatsoever, take a third measurement to confirm the absolute truth. It is incredibly easy to accidentally read a 5/8th mark as a 3/8th mark or to transpose numbers in your head.
Mapping the Room
If you are ordering shades for multiple windows in the same room, clearly label each measurement on your notes. Give each window a unique identifier, such as “Living Room North Window Left,” “Living Room North Window Center,” and so forth. Treat each window as a unique entity. Even if two windows look identical to the naked eye, their exact measurements can vary by a crucial fraction of an inch. Never measure one window and assume the adjacent window requires the exact same dimensions.
Considering Fabric Behavior
Keep in mind that certain types of window treatments behave differently depending on their size. Very wide roller shades, for example, might require a heavier bottom rail or a specific tube diameter to prevent the fabric from sagging in the middle over time. Extremely tall cellular shades will have a thicker stack when fully raised, which might block more of your upper window view than anticipated. Reviewing the specific product details and limitations for your chosen shade type is just as important as measuring the window itself.
Moving Forward
With your precise measurements secured and verified, you are fully equipped to move forward. Taking the time to understand the nuances of inside versus outside mounts, utilizing the proper metal measuring tools, and recording every dimension down to the eighth of an inch are the cornerstones of a successful window treatment project. By following these rigorous steps, you ensure that the custom shades you order will arrive perfectly sized, ready to enhance the comfort, privacy, and visual appeal of your home for years to come.